Here are a few examples of the photo wood blocks I made (I need a better name for these)....
And now here is the quick tutorial.......
Supplies:
- 2x 4 Wood-- cut into 4x4 or 4x6 pieces. I had left over wood from a recent fence replacement and I bought some at Home Depot. I purchased a long piece for $2.50 and the Home Depot guy was nice enough to cut it up for me.
- Paint: I had some left over white paint in my garage.
- Stain--I picked up free sample packets of stain at my local Orchard Supply store
- Modge Podge Glue--$3.50 at Michaels
- Tacky Spray--$4.99 at Michaels
- Sandpaper to smooth out the edges of your wood
- Your favorite photos (printed on matte paper and cut to size)
- If you want to add captions or make inspirational word blocks, vellum paper works nicely
- Music--I always like to craft to some good music!
The Process:
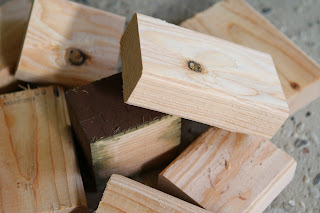
So I took my unfinished wood that looked like this and sanded down the edges:
And painted it to look like this:
I then stained the edges a bit to give it an aged look:
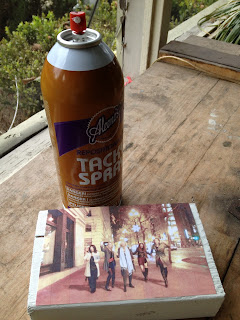
And using my Sticky Spray, glued my photo to the block:
After the photo dried (which was just a few minutes), I used the Modge Podge and painted a couple of layers on top of the photo being careful to smooth out any air bubbles:


No comments:
Post a Comment
Thank you for your kind words. We appreciate and read each and every one.